When painting your blades, be sure to follow the instructions for the blade that you have.
- Carbon fiber blades:
- Bantam blades
Painting Carbon Fiber Blades
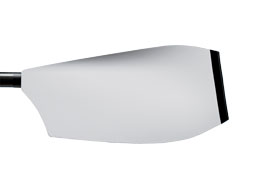
Painting Factory-Finished White Blades
(Blades finished with the standard white powder coat manufactured November 2009 to present or the standard white urethane manufactured 2007 to November 2009)
- Using gray spray primer, apply a light dusting, or "guide coat," of primer on both sides of the blade from a distance of 18–20 inches. This will act as a visual guide when sanding and will expose any low spots or imperfections during the surface prep. Allow to dry for 5–10 minutes.
- With 220 grit paper, hand sand or use an orbital sander to sand both sides of the blade to a dull finish. (An orbital sander will provide the best prep with the least amount of effort.) IMPORTANT: Proper paint adhesion requires that the blades are thoroughly sanded.
- To sand by hand:
Start sanding in a corner of the blade. Work your way across the blade surface removing the previously applied guide coat. Sand the other side. - To sand with an orbital sander:
Sand the back surface of the blade up to and around the cone area. Hand sand the cone area. Sand the front of the blade.
- To sand by hand:
- Using rubbing alcohol on a lint-free cloth, wipe both sides of the blade to remove the sanding dust. Allow the alcohol to evaporate completely. IMPORTANT: Before priming and painting your blade:
- Mix and apply the primer/paint per the manufacturer’s instructions (see paint recommendations).
- Test the primer/paint on a small portion of the sanded blade to ensure that it does not bubble or easily scrape or peel off.
- DO NOT paint the Vortex Edge.
- Prime the blade with a primer that is compatible with the finish coat you are using. Follow the instructions from the primer manufacturer to prepare the primer.
- Mix the paint (and thinner if appropriate) per the manufacturer’s instructions. Using a bristle or foam brush, apply paint in light coats starting with the edges of the blade, making sure to smooth excess paint on both blade surfaces. Start at one end of the blade surface and apply the paint in smooth, even strokes. Allow the paint to dry per the manufacturer’s instructions before recoating to your desired finish. Note: One coat will not provide good results. We recommend lightly applying multiple coats. Applying thick coats may produce paint runs and improper curing.
Painting Factory-Finished Custom Colored Blades
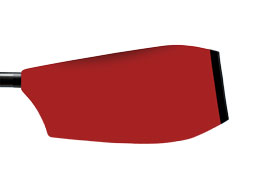
New blades have been finished with a custom color from Concept2’s Urethane Color option system at the Concept2 factory. With appropriate preparation, these finishes are compatible with most other finish coats such as acrylic enamel, acrylic urethane, urethane, or epoxy paint. Prepare these blades for painting as follows:
- Sand the portion of blade to be painted with 220 grit sandpaper.
- Wipe the blade clean with alcohol or automotive paint degreaser.
- IMPORTANT: Test the paint on a small portion of your blade before painting the entire blade (see paint recommendations). Let the paint dry completely to assure proper adhesion. Be sure it does not bubble or easily scrape or peel off. If it does, please contact Concept2 for assistance.
- Spray or brush the rest of the blade with your finish coat of paint. If your oars have the Vortex Edge, DO NOT paint the plastic vortex edge cap.
Painting Blades Manufactured in 2006 and Earlier
Prepare gray blades for finish painting as follows:
- Sand the blades lightly with fine (220 grit) sandpaper.
- Wipe the blades clean with alcohol.
- IMPORTANT! Test the paint on a small surface of your blade before painting the entire blade (see paint recommendations). Let the paint dry completely to assure proper adhesion. Be sure it does not bubble or peel off, and then proceed with painting the rest of the blade.
- Apply a finish coat with automotive or marine grade acrylic enamel paint. If your oars have the Vortex Edge, DO NOT paint the plastic vortex edge cap.
Paint Recommendations for Carbon Fiber Blades
We recommend using one of the following products to paint Concept2 blades. These products are readily available online, in hardware stores, or at marine outlets.
For Best Overall Performance
Polyurethane–Single Part
- User-friendly; brush-on options available
- Limited color options
- Highly durable
Recommended brands:
TotalBoat Brand (Wet Edge Topside) available online at jamestowndistributors.com.
Interlux (Brightside) available online or at most marine outlets.
Alternative Options
Acrylic Enamel–Single Part
- Color options are readily available from most hardware stores (spray-on product)
- User-friendly
- Low durability
Epoxy–Two-Part
- Limited color options
- Compatibility issues when applying over existing paint
- LEAST user-friendly (Highly chemical-based product)
- Highly durable
Vinyl Recommendations for Carbon Fiber Blades
Many customers choose a solid color factory finish from Concept2, then add unique designs (such as stripes) with decals. New decal materials are easy to apply, replaceable, and don’t suffer from the “bubbling” typical of more traditional vinyl materials.
Two products we recommend are 3M™ Wrap Film Series 1080 and Avery® WS900 Supreme Wrapping Vinyl Film, both of which can be found from many stores online (Concept2 does not sell material directly). We recommend testing any vinyl decals before racing.
Painting the Bantam Blade
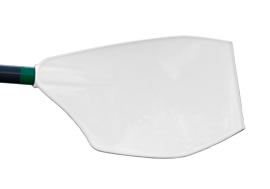
The Bantam blade, standard on Bantam Sculls, is made of polypropylene, a similar thermoplastic as the bumpers on most cars today. You must use a paint system formulated for this type of plastic (also referred to as PP or TPO), or the paint will not stick.
We recommend shopping at your local auto supply store for “bumper paint” for the base color of your blade. A bumper paint system may include a cleaner and an “adhesion enhancer” or primer. FOLLOW THE MANUFACTURER’S INSTRUCTIONS.
We have tested these brands with good success:
- SEM®
- Dupli-color®
- Urethane Supply Company® brands
Test one side of one blade first before painting a fleet of blades. Follow the manufacturer’s instructions for how to add additional designs or stripes to your base color.