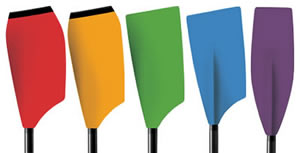
Concept2 offers the following blade colors in addition to our standard white. These colors are available at an additional cost of $20.00 per blade and longer lead times may apply. There is no additional charge for the standard white.
Colored blades are available as single, solid colors only. You will need to apply any additional designs or stripes you may need. When placing an order for colored blades, please have the RAL number and name handy to give to our customer service representatives.
Important: These colors are from the RAL international color standard. Due to individual computer monitor and printer limitations, these samples are approximations and may not accurately reflect the true color. Please contact our customer service team if you'd like to receive a printed copy of our blade color options.
Standard White
RAL 1000 Series
RAL 1003
Signal Yellow
RAL 1004
Golden Yellow
RAL 1011
Brown Beige
RAL 1016
Sulfur Yellow
RAL 1017
Saffron Yellow
RAL 1019
Grey Beige
RAL 1021
Colza Yellow
RAL 1037
Sun Yellow
RAL 2000 Series
RAL 2000
Yellow Orange
RAL 2002
Vermillion
RAL 2010
Signal Orange
RAL 3000 Series
RAL 3001
Signal Red
RAL 3003
Ruby Red
RAL 3005
Wine Red
RAL 3013
Tomato
RAL 3016
Coral Red
RAL 3018
Strawberry
RAL 3022
Salmon Pink
RAL 3027
Raspberry Red
RAL 4000 Series
RAL 4002
Red Violet
RAL 4005
Blue Lilac
RAL 4006
Traffic Purple
RAL 4007
Purple Violet
RAL 5000 Series
RAL 5002
Ultramarine
Blue
RAL 5003
Sapphire Blue
RAL 5007
Brilliant Blue
RAL 5009
Azure Blue
RAL 5010
Gentian Blue
RAL 5012
Light Blue
RAL 5013
Cobalt Blue
RAL 5015
Sky Blue
RAL 6000 Series
RAL 6001
Emerald Green
RAL 6005
Moss Green
RAL 6010
Grass Green
RAL 6016
Turquoise
Green
RAL 6018
Yellow Green
RAL 6024
Traffic Green
RAL 6026
Opal Green
RAL 7000 Series
RAL 7001
Silver Gray
RAL 7004
Signal Gray
RAL 7006
Beige Gray
RAL 7015
Slate Gray
RAL 7032
Pebble Gray
RAL 7035
Light Gray
RAL 7042
Traffic Gray A
RAL 8000 Series
RAL 8002
Signal Brown
RAL 8007
Fawn Brown
RAL 8012
Red Brown
RAL 8024
Beige Brown
RAL 8028
Terra Brown
RAL 9000 Series
RAL 9017
Traffic Black